# How to link a domain?
If you've been interested in creating your own website, you probably already know that a domain is the site's name, by which a computer finds the server with the needed site. To link a domain to a server, you first need to determine if your domain registrar has its own NS servers and whether it's possible to edit DNS records.
Most popular registrars provide DNS record changes directly with them, however, if there's no such option, you can first connect your site to CloudFlare. After connection, you'll have full control over the domain's DNS records and good free protection of your site from DDoS attacks.
# Server without NAT option
If the public IPv4 address for your service is 12.34.56.78, then in the personal dashboard of your DNS provider or registrar you need to
add such a record:
A @ 12.34.56.78
Here the @ symbol means that only the root domain will be linked. To link the domain with all subdomains, you need to add another such record:
A * 12.34.56.78
Adding DNS records can take from 5 minutes to 24 hours, depending on the provider. To check current records you can use the Google Admin Toolbox (opens new window) service. If you've already configured a web server, then to check you can simply open the domain in a browser.
# Server with NAT option
Since public ports 80 or 443 with NAT option cannot be occupied directly, for hosting a small site you can use Nginx Proxy Manager.
First, you need to link your domain to the common IP address. If the public address from the ports table for your service is 23.189.104.254,
then in the personal dashboard of your DNS provider or registrar you need to add such a record:
A @ 23.189.104.254
Here the @ symbol means that only the root domain will be linked. To link the domain with all subdomains, you need to add another such record:
A * 23.189.104.254
Adding DNS records can take from 5 minutes to 24 hours, depending on the provider. To check if the domain is linked, simply open it in a browser. If you see the Rifty information page about connecting Nginx Proxy Manager, then the domain is successfully linked.
Next, open Nginx Proxy Manager from the service page in the Rifty personal dashboard. Its interface looks like this:
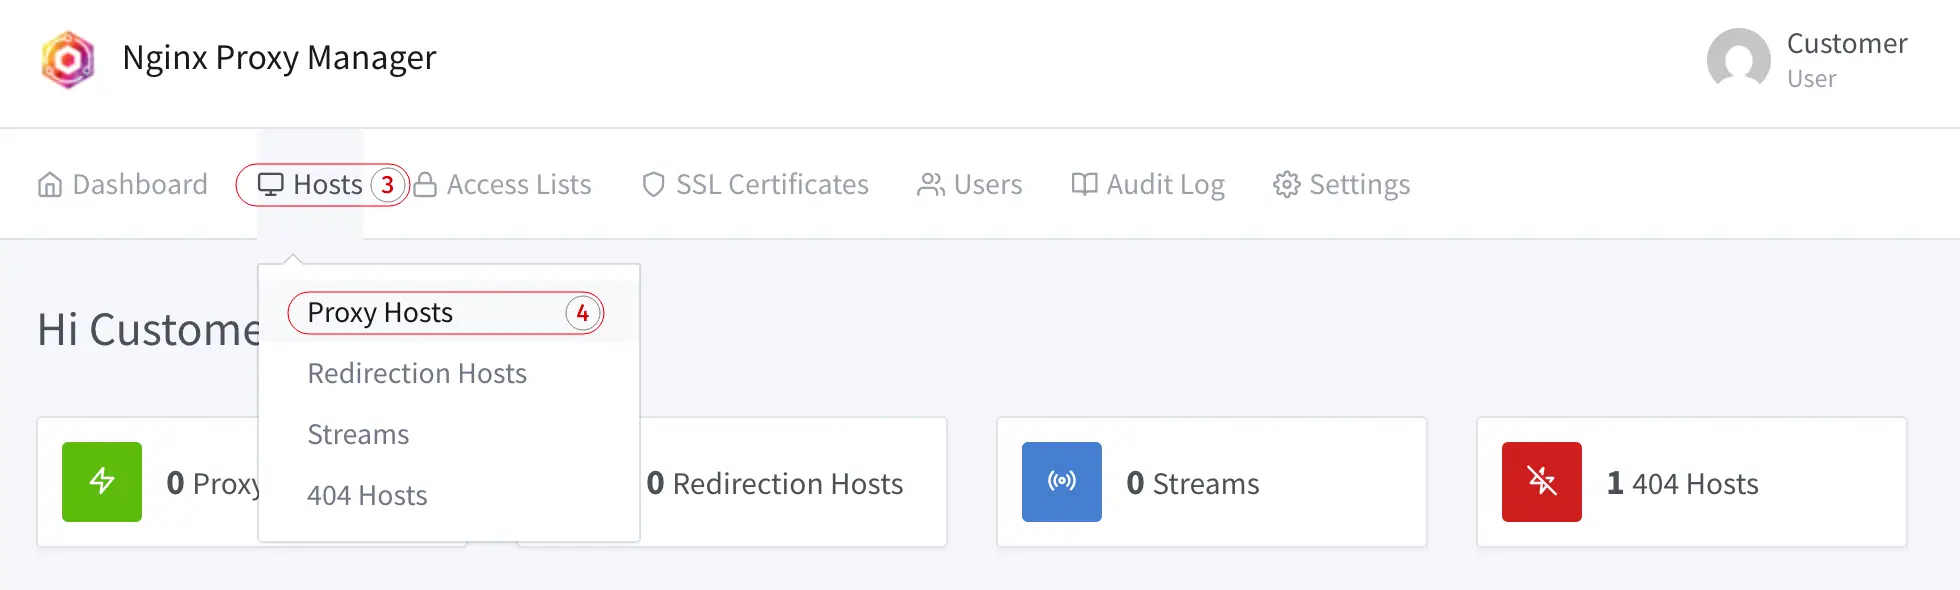
To specify where to direct traffic from the linked domain, go to Hosts[3], then Proxy Hosts[4] and on the opened page
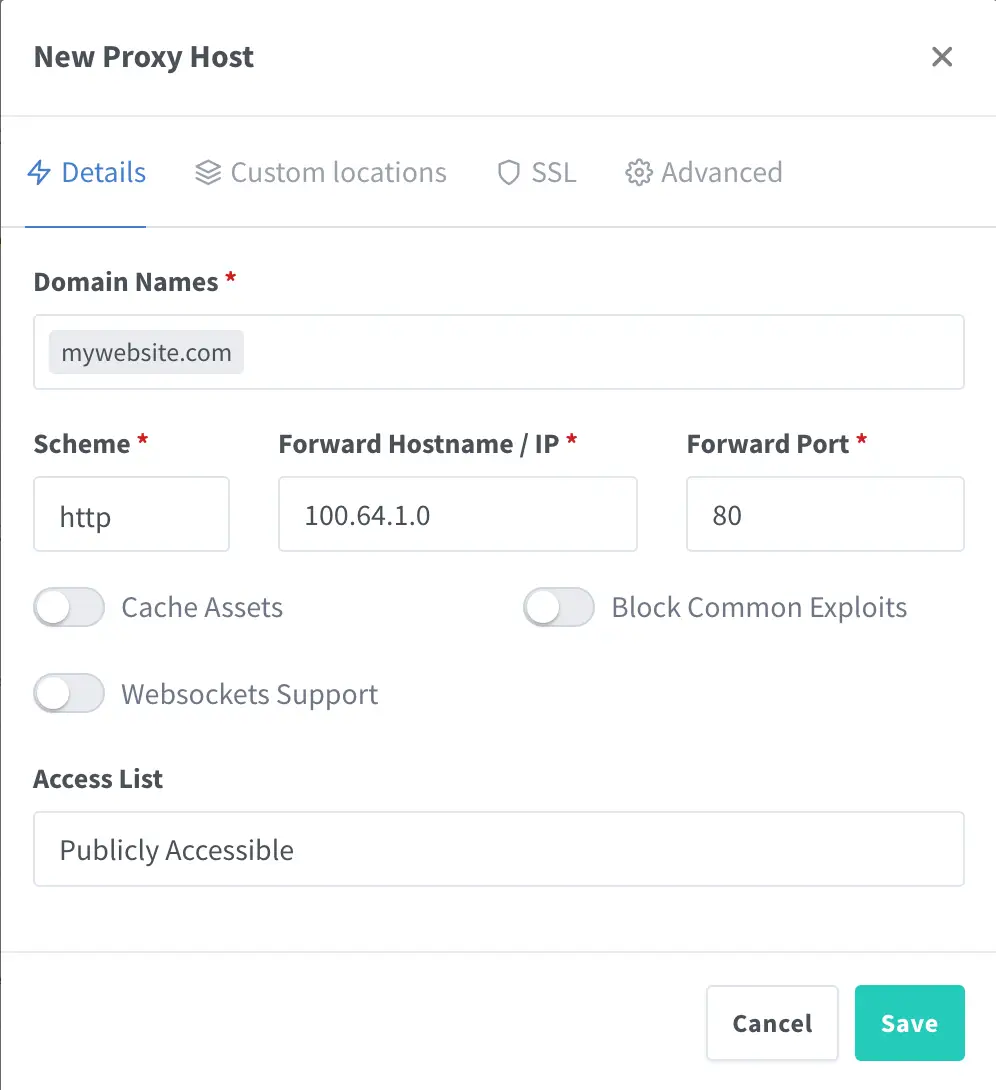
click Add Proxy Host. A modal window for adding a new host will appear, in which you need to specify the domain and the server's Main IP.
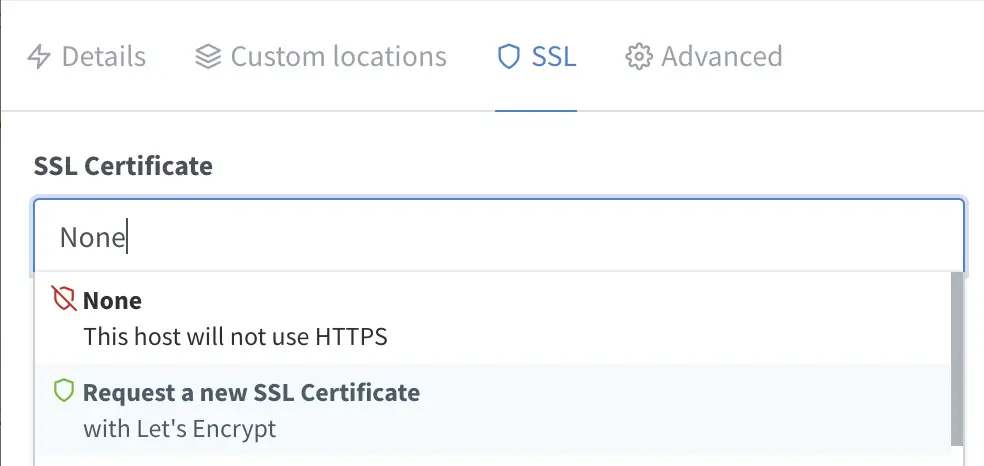
To avoid manually issuing a certificate, you can select Let's Encrypt certificate issuance on the SSL tab. It's free and allows the server to serve only HTTP, while clients can access via the secure HTTPS protocol.
Additionally, if the web server is running on another port (not 80), it can be specified without performing port forwarding. For example, front-end and back-end frameworks can occupy ports 4200, 5173, 8080 and similar, while Apache and Nginx web servers in HTTP mode work on the standard port 80.
After adding the host (domain proxy rule) and successful domain linking, your site will immediately become available.