# SSH Connection
To connect to a server running most popular Linux distributions, the SSH protocol is used. First, you'll need a special program - an SSH client. There are several popular options:
- For macOS, Linux, Windows 10 and 11, there is usually a built-in utility called
ssh. In this case, you can connect immediately without third-party programs, but it only has a console interface. - The widely used PuTTY (opens new window) client, completely free and with a graphical interface.
- Cross-platform and more user-friendly Termius (opens new window) client with a free plan that includes everything you need.
There are other clients that can be found on the internet. Decided on a client? Great, now let's figure out what we need and where to enter the necessary data in the client.
# Using the ssh utility
To connect via the console utility ssh, the command is structured as follows:
ssh <username or login>@<server address>
The example above corresponds to the command:
ssh root@23.189.104.123
If you need to specify a port (for example, for NAT, or if you changed the SSH port), add the -p <port number> argument:
ssh -p 1234 root@23.189.104.123
On first connection, the program will ask if we trust the server. Since we trust our server, to continue type yes and press Enter:
The program will remember the server key and won't ask again. Next, once the connection is established, the server will ask for a password:
Attention
When entering the password, it won't be displayed! To avoid typing the password blindly, you can copy it from your personal dashboard.
In the Windows console window, pasting copied text is done via right-click or the key combination Shift + Insert.
For macOS, the standard key combination Command + V works.
Since the password is not visible, you might accidentally enter a space or extra letter. Don't panic immediately if the password doesn't work, you can try again.
If the password is correct, you'll see the server command line, which means you've successfully connected to the server!
# Using PuTTY
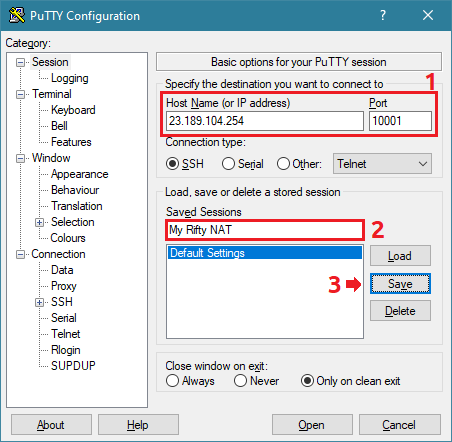
After opening the program, the form we need appears immediately. We fill in the server data - address (Host Name or IP address), according to the server data
and port, if you changed it, or are using a server with NAT option. Next, you can save the config by specifying a name in the field under Saved Session and clicking Save,
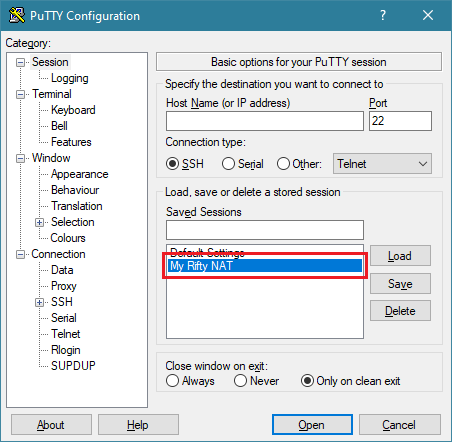
or connect immediately by clicking Open. You can connect to a saved server by double-clicking on the name.
Additionally
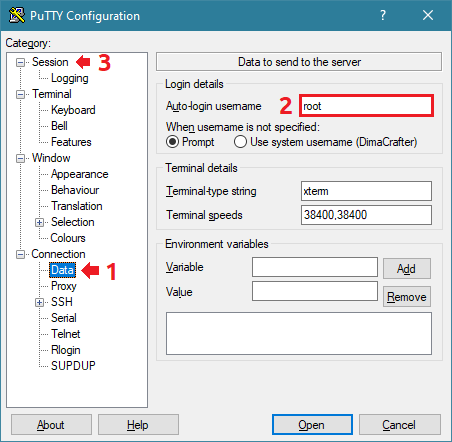
If you wish, you can specify the username in the Connection > Data section before saving, then return to Session.
Here's how it looks in the program itself:
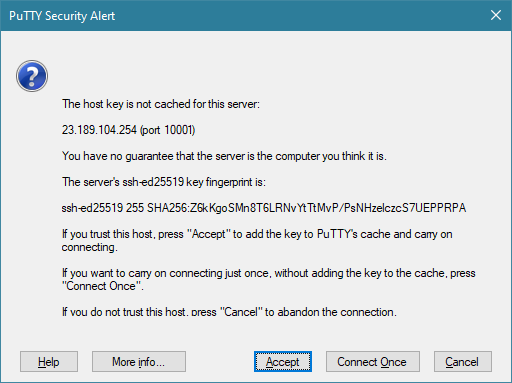
On first connection, the program will ask if we trust the server. Since we trust our server, to continue click Accept.
The program will remember the server key and won't ask again. Next, once the connection is established, the server will ask for a password:

Attention
When entering the password, it won't be displayed! To avoid typing the password blindly, you can copy it from your personal dashboard. To paste, right-click.
Since the password is not visible, you might accidentally enter a space or extra letter. Don't panic immediately if the password doesn't work, you can try again.
More details on where to find what data are described in the article "How to connect to a server?". If the password is correct, you'll see the server command line, which means you've successfully connected to the server!
# Using Termius
For variety, let's show connection through the mobile Termius app. The PC version has a similar interface, all actions can be performed in it as well.
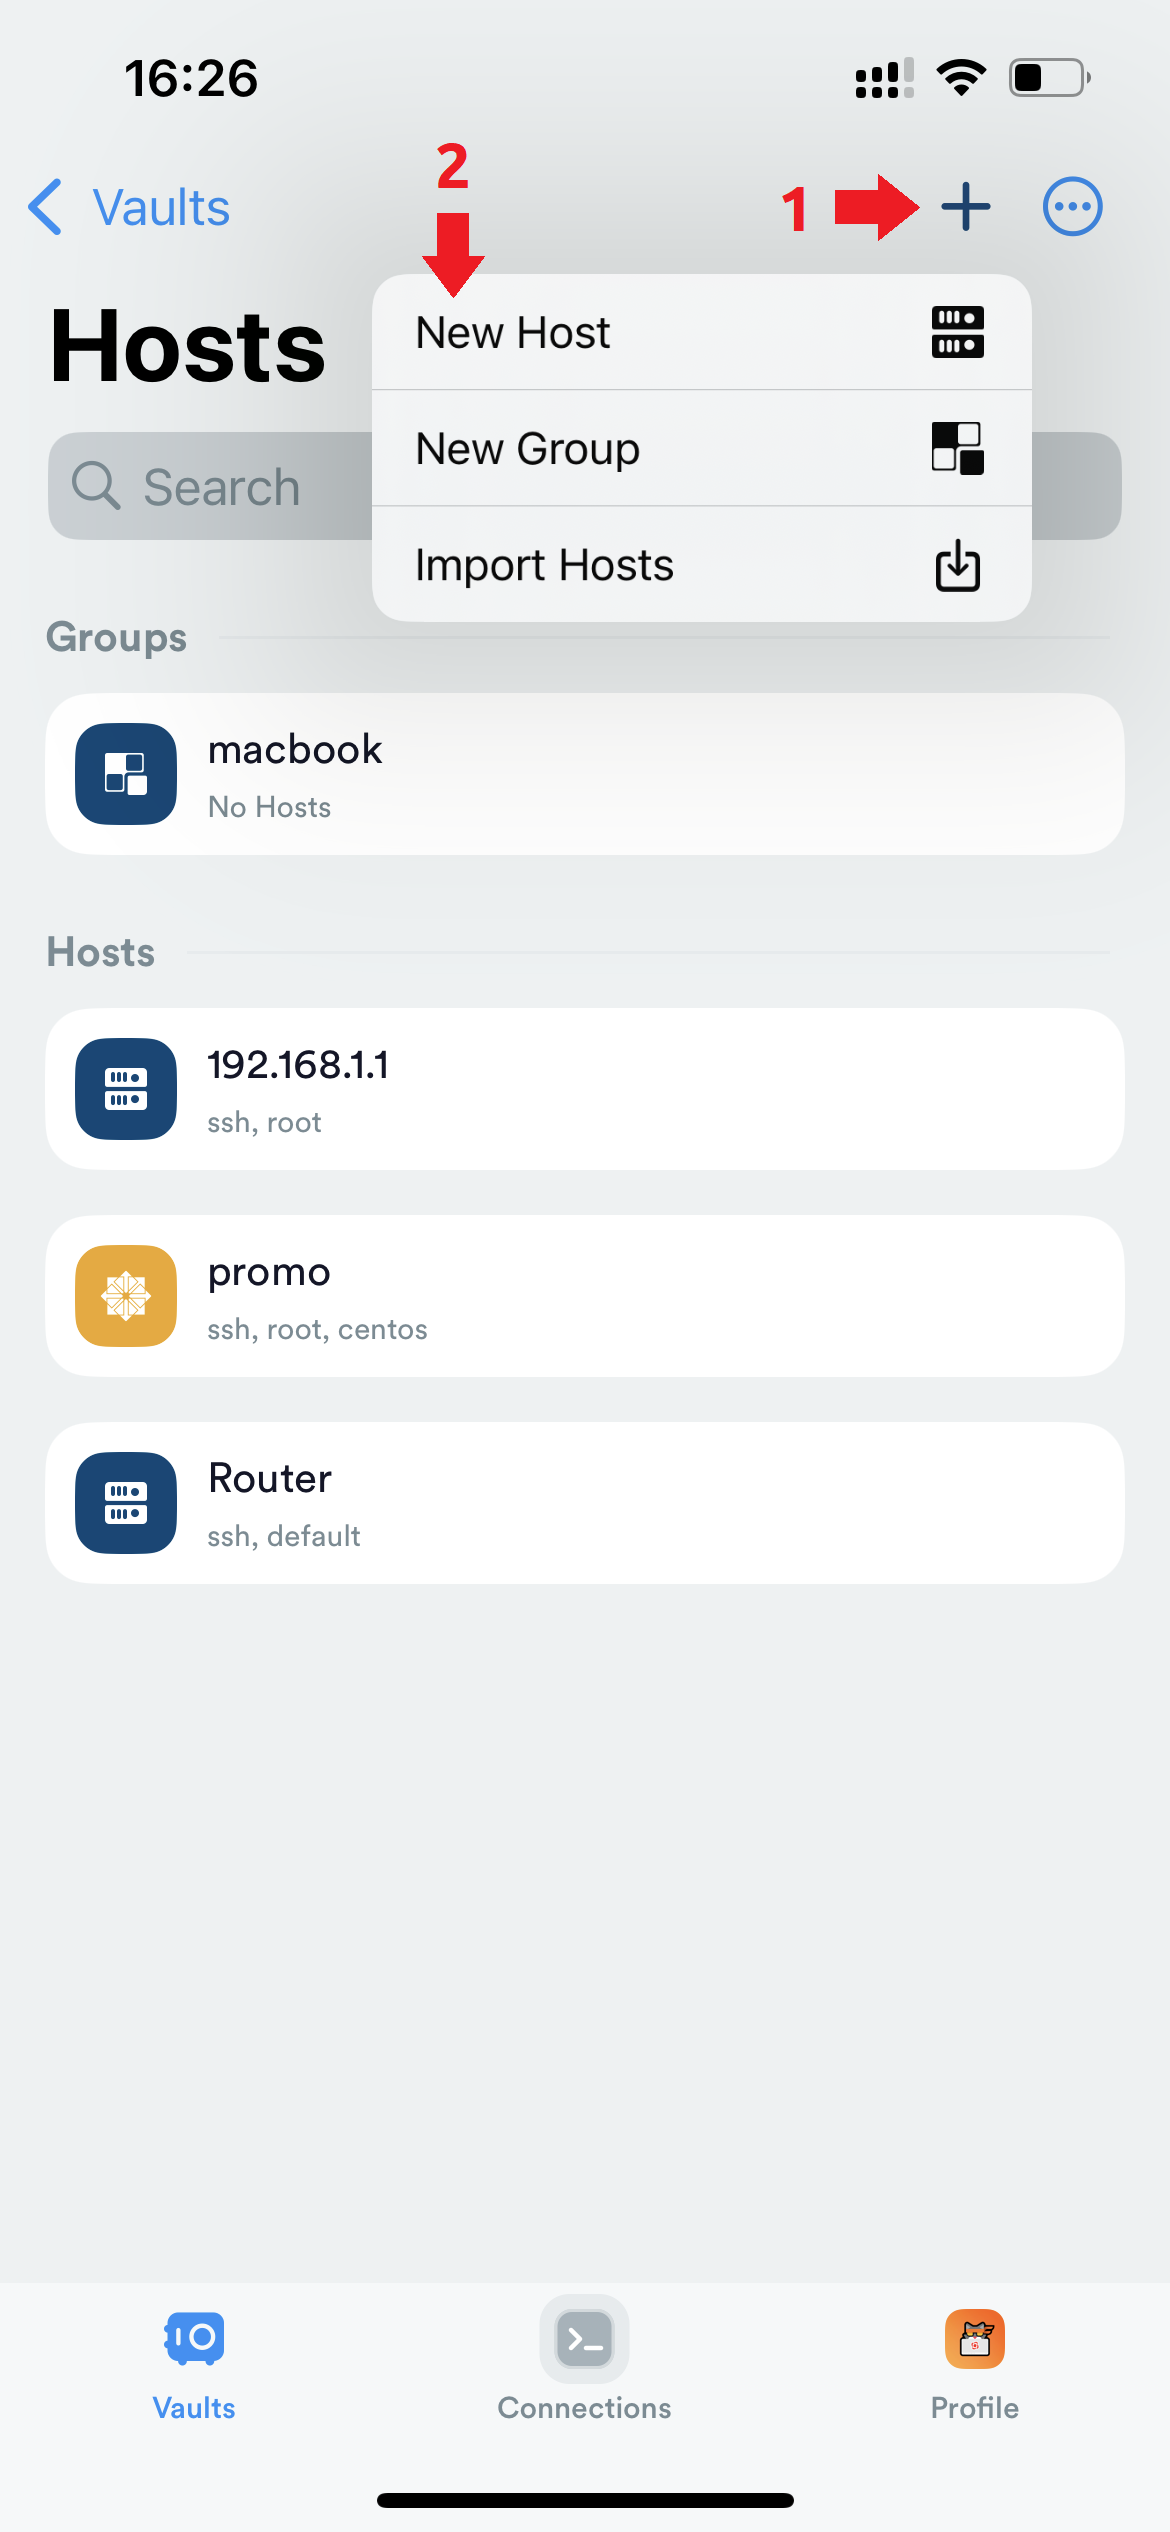
First, you need to add a server in the Hosts section. To do this, click the plus at the top and select New Host.
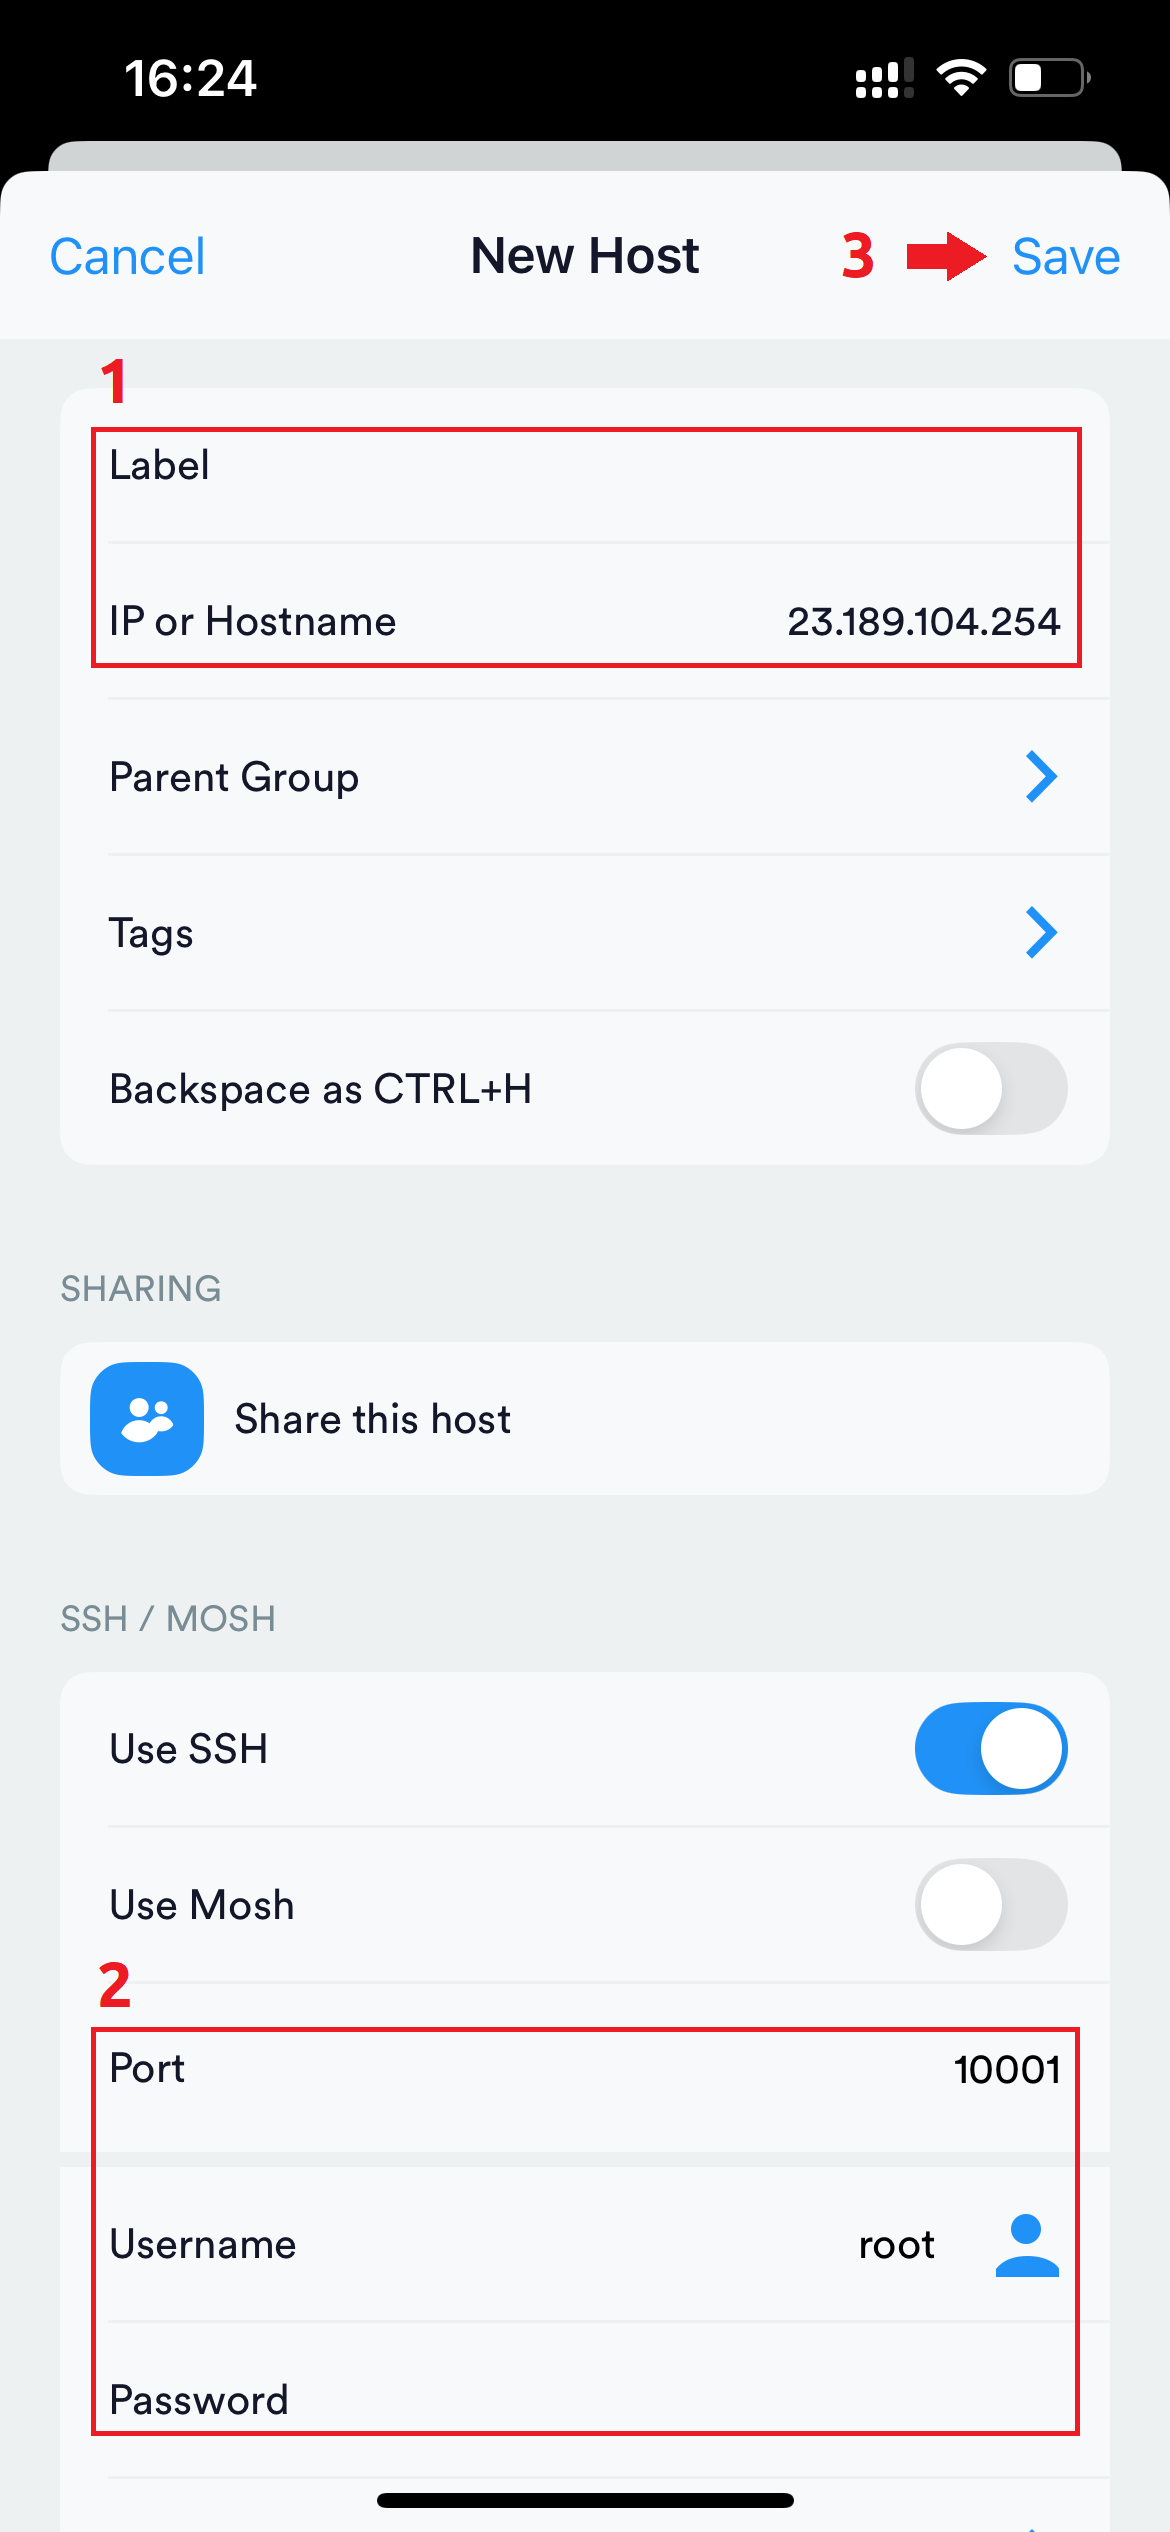
Next, fill in the server data - the label can be anything, and the address (IP or Hostname), username (Username) and password (Password)
are specified according to the server data. Port is specified optionally, if you changed it, or are using a server with NAT option.
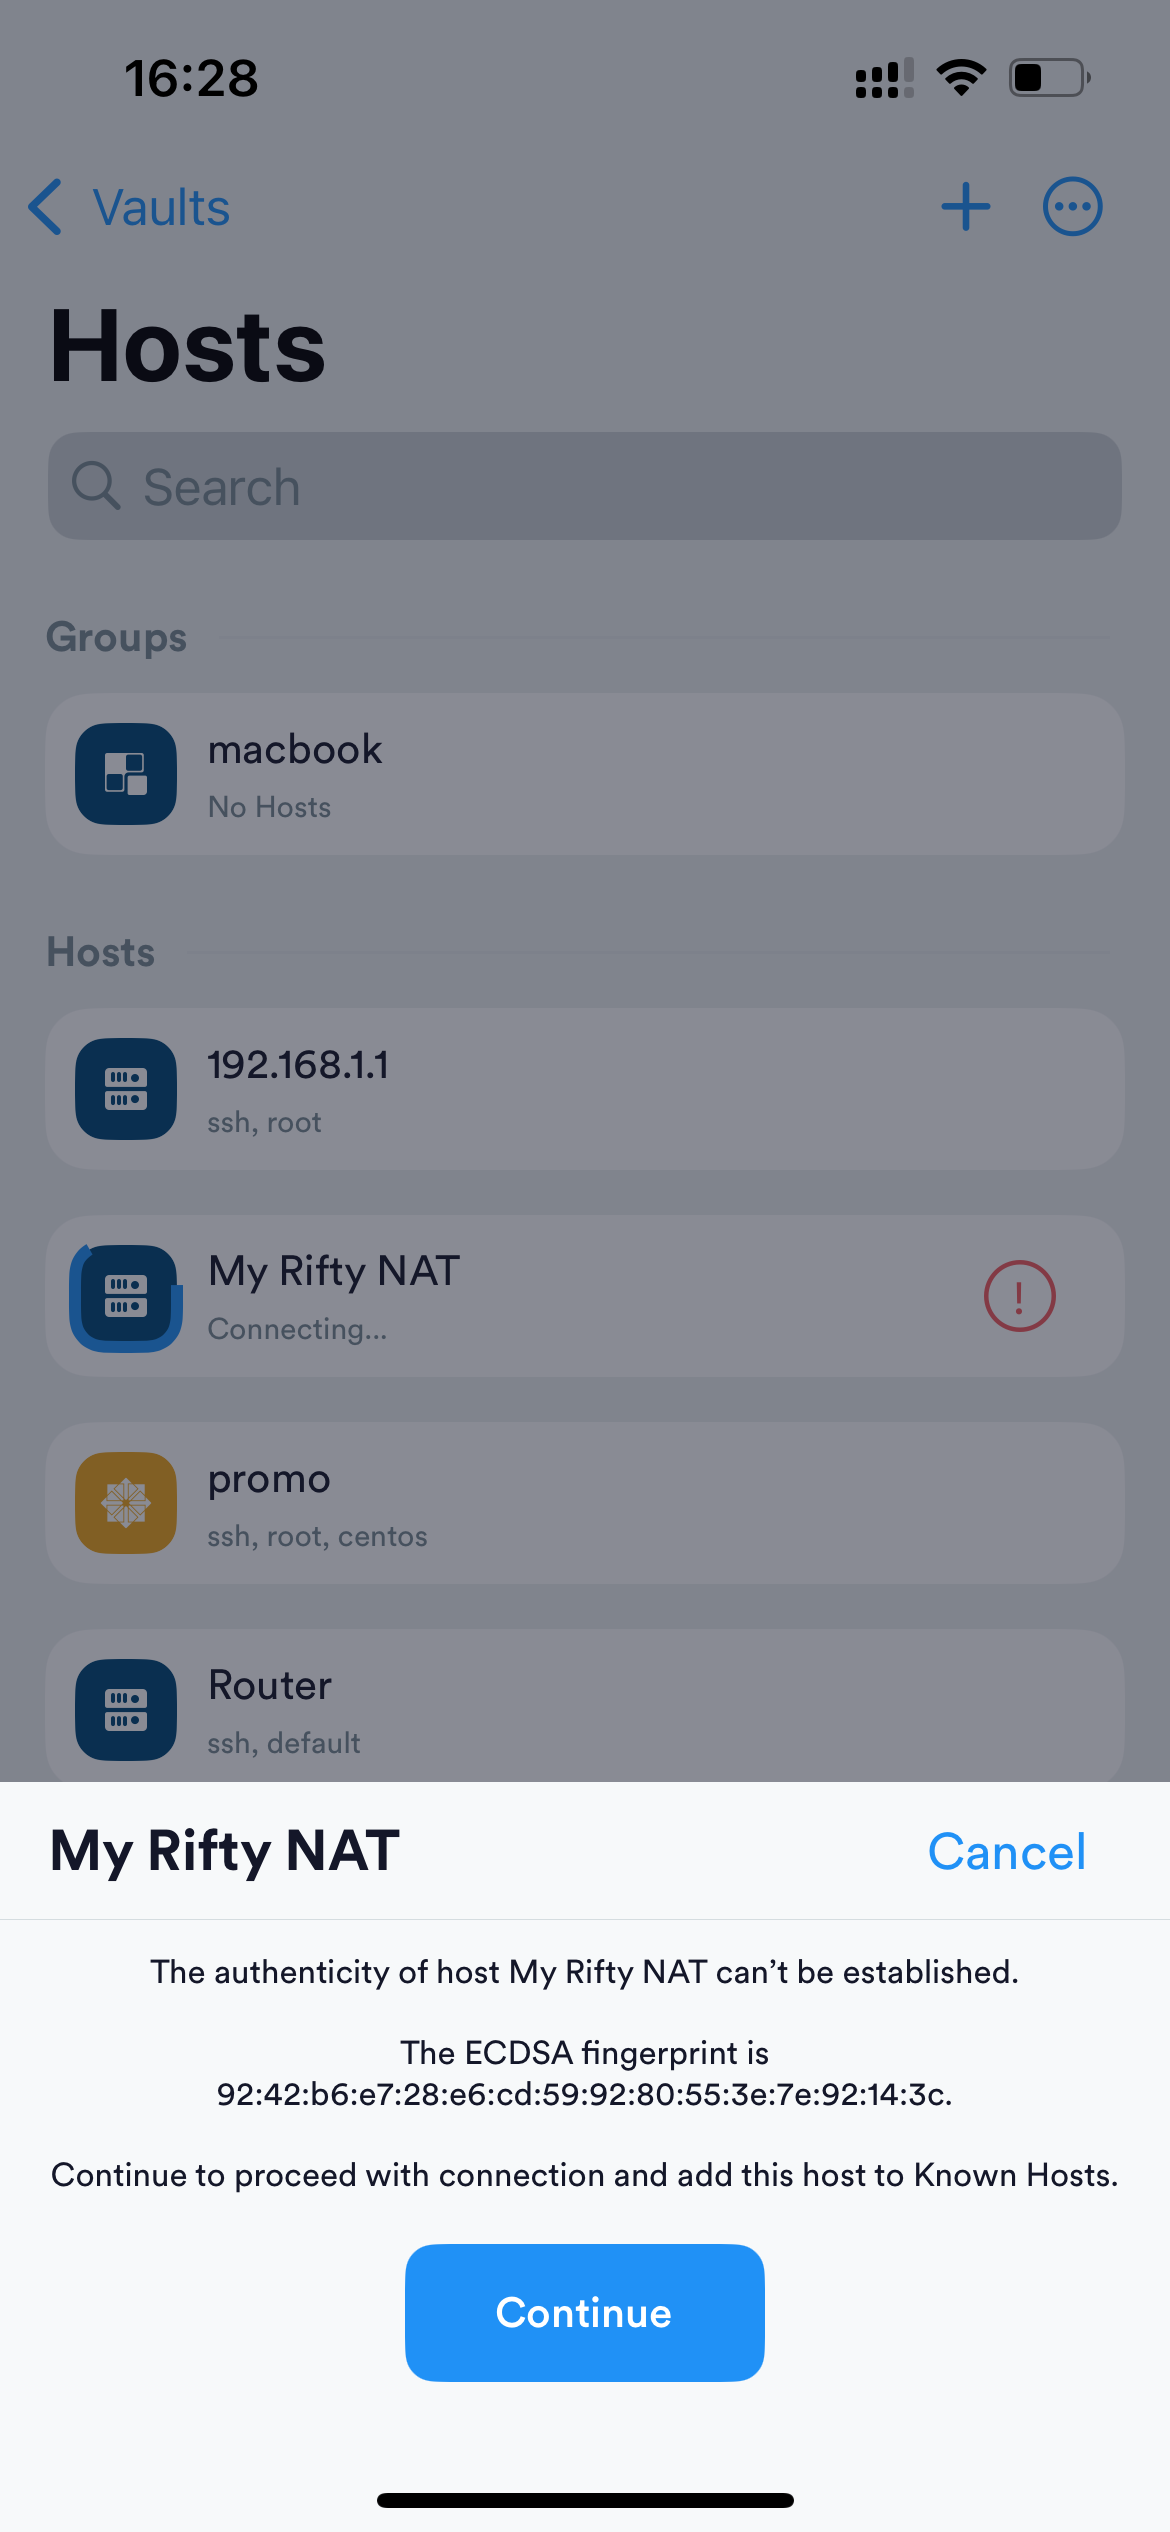
On first connection, the program will ask if we trust the server. Since we trust our server, to continue click Continue.
The program will remember the server key and won't ask again. Next, if the data is correct, the connection will be established and you'll get access to the server.
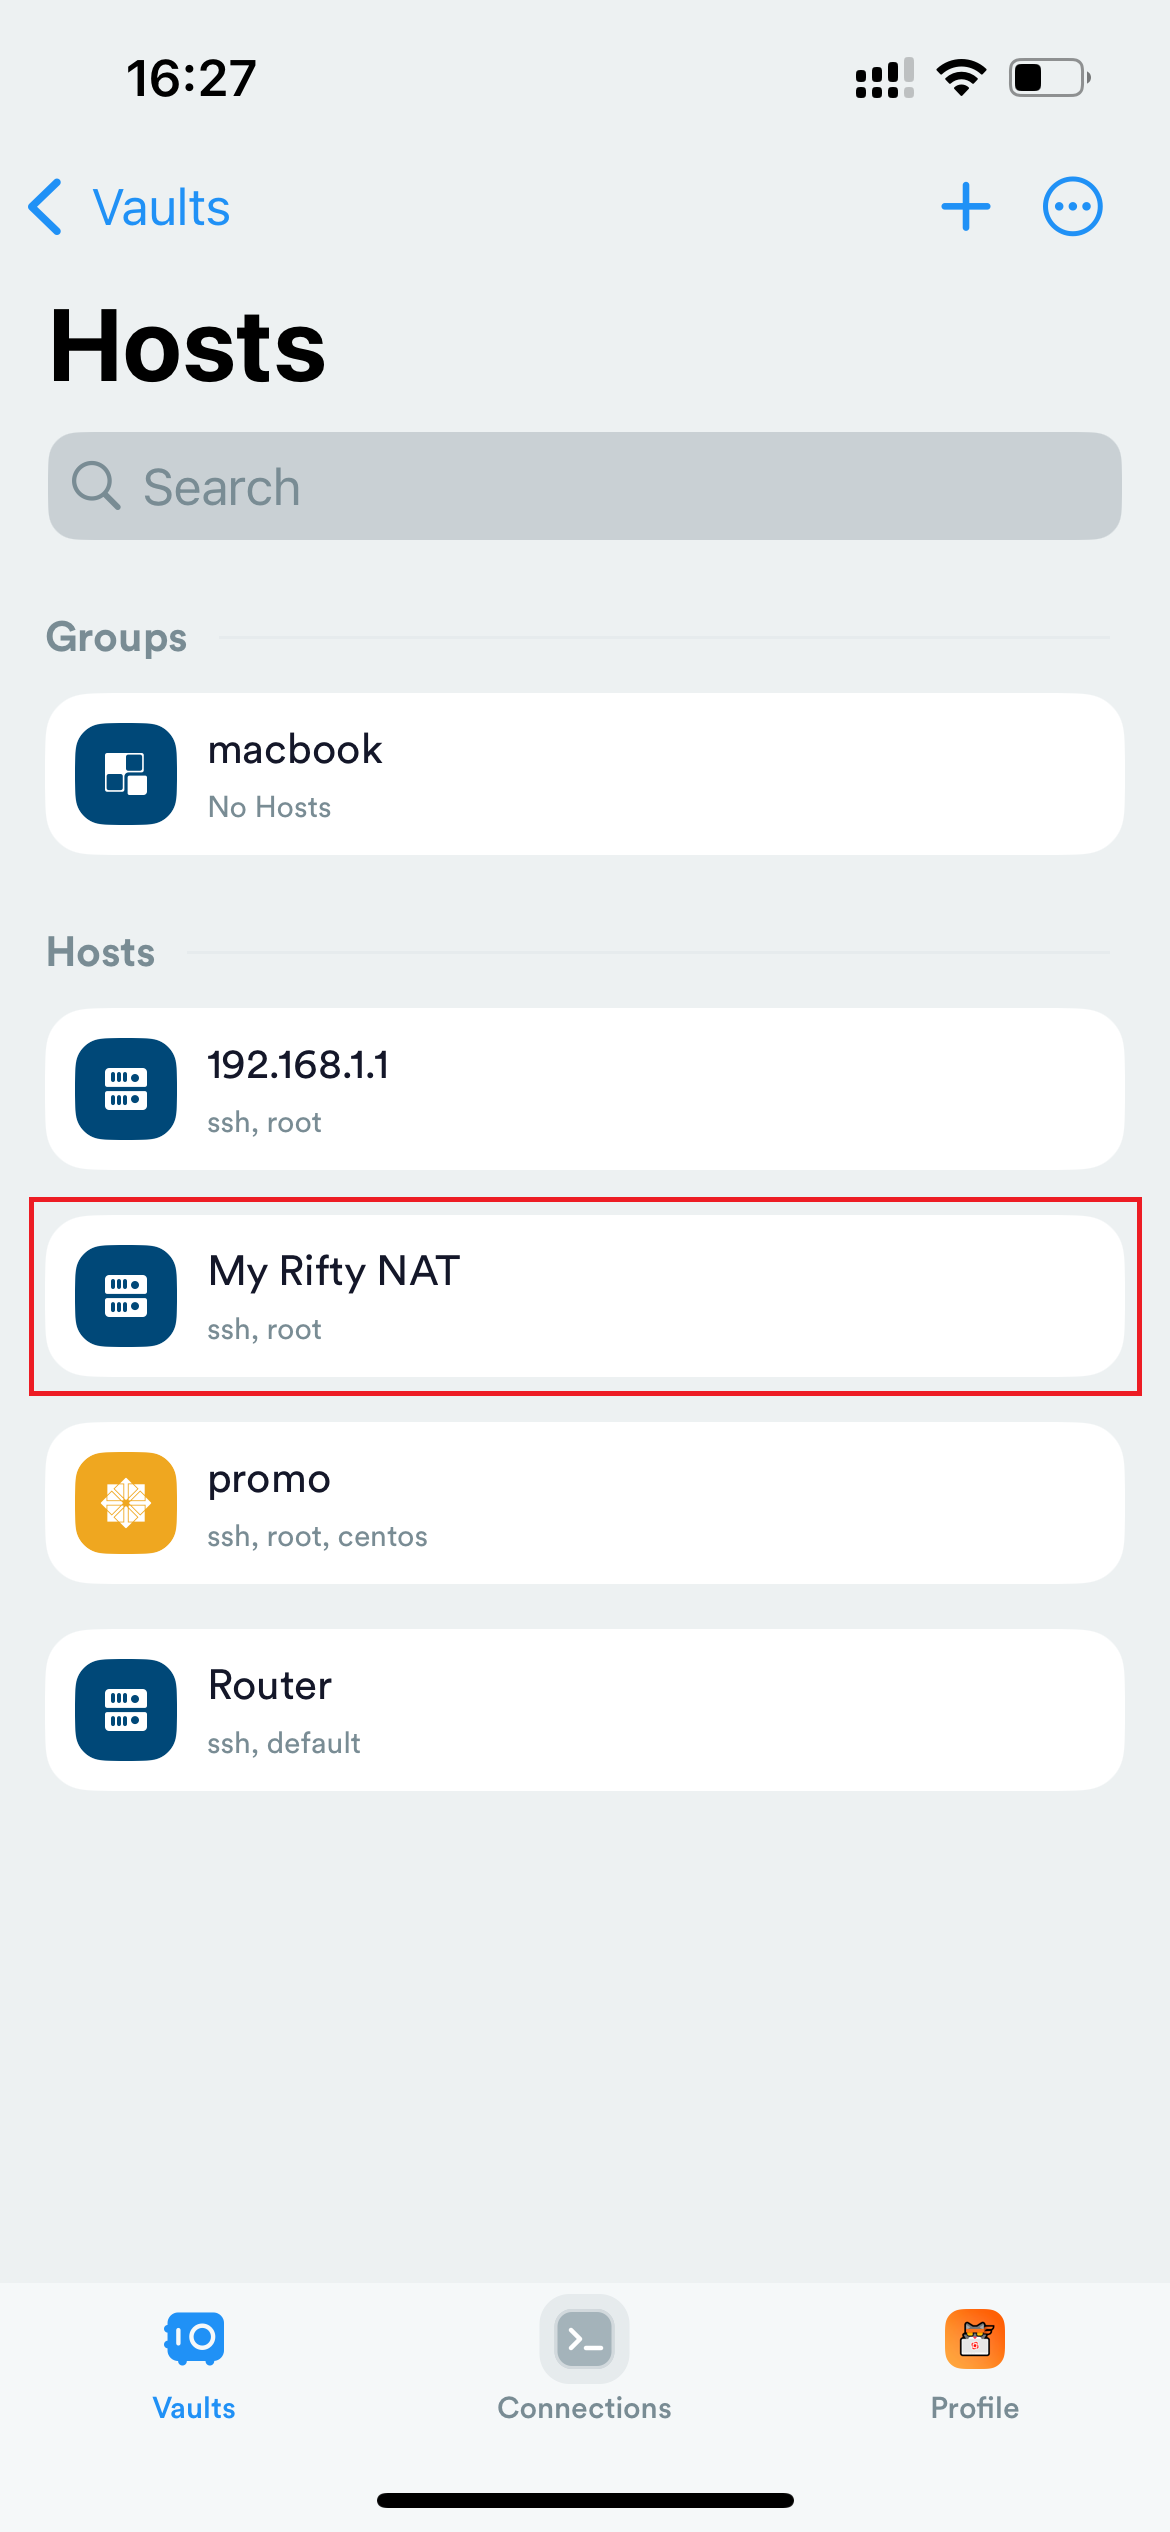
More details on where to find what data are described in the article "How to connect to a server?", and below all steps are shown with screenshots: